Authentication in MERN Stack Using JWT
Github:https://github.com/mehulk05/Blogapp-using-MERN
Live Demo:https://mehulk05.github.io/Blogapp-using-MERN/
A live demo


JSON Web Token is one of the best standards to implement an authentication system in your MERN stack app. In this article, we will just have look at authentication in the MERN stack app using JWT.
What is JSON Web Token?
JSON Web Token (JWT) is an open standard (RFC 7519) that defines a compact and self-contained way for securely transmitting information between parties as a JSON object
When should you use JSON Web Tokens?
Here are some scenarios where JSON Web Tokens are useful:
- Authorization: This is the most common scenario for using JWT. Once the user is logged in, each subsequent request will include the JWT, allowing the user to access routes, services, and resources that are permitted with that token. Single Sign-On is a feature that widely uses JWT nowadays, because of its small overhead and its ability to be easily used across different domains.
- Information Exchange: JSON Web Tokens are a good way of securely transmitting information betwWhat is the JSON Web Token structure?
In its compact form, JSON Web Tokens consist of three parts separated by dots (.), which are:
- Header
- Payload
- Signature
Therefore, a JWT typically looks like the following.
xxxxx.yyyyy.zzzzz
Because JWTs can be signed — for example, using public/private key pairs — you can be sure the senders are who they say they are. Additionally, as the signature is calculated using the header and the payload, you can also verify that the content hasn’t been tampered with.
The Server-Side Part: Create a JWT
So the code snippets have a signup route that will check whether a user exists or not. If the user doesn’t exist it will go further and encrypt the password using bycrypt module and return a 200 status code once it’s done creating a user.
The next step is the login route, here it will check for user's email and password are matching or not. If a matching user is found here we will do one important step. Here we will create our JWT token.
const token = jwt.sign(
        { email: fetchedUser.email, userId: fetchedUser._id },
        "secret_this_should_be_longer",
        { expiresIn: "1h" }
      );res.status(200).json({
        token: token,
        expiresIn: 3600,
        userId: fetchedUser._id
});- So here we are creating the JWT token with the first parameter of the “sign” method is the information that needs to be placed into the payload (and then into the token itself).
- The second parameter is the secret key used to create the digest.
- The third is the option representation. In this case, I set the expiration date of the token in seconds.
The Server-Side Part: Check and Verify a JWT (MiddleWare)
// check-auth.js
const jwt = require("jsonwebtoken");module.exports = (req, res, next) => {
try { const token = req.headers.authorization.split(" ")[1];
const decodedToken = jwt.verify(
token,
"secret_this_should_be_longer"
); req.userData = {
email: decodedToken.email,
userId: decodedToken.userId
}; next();
} catch (error) {
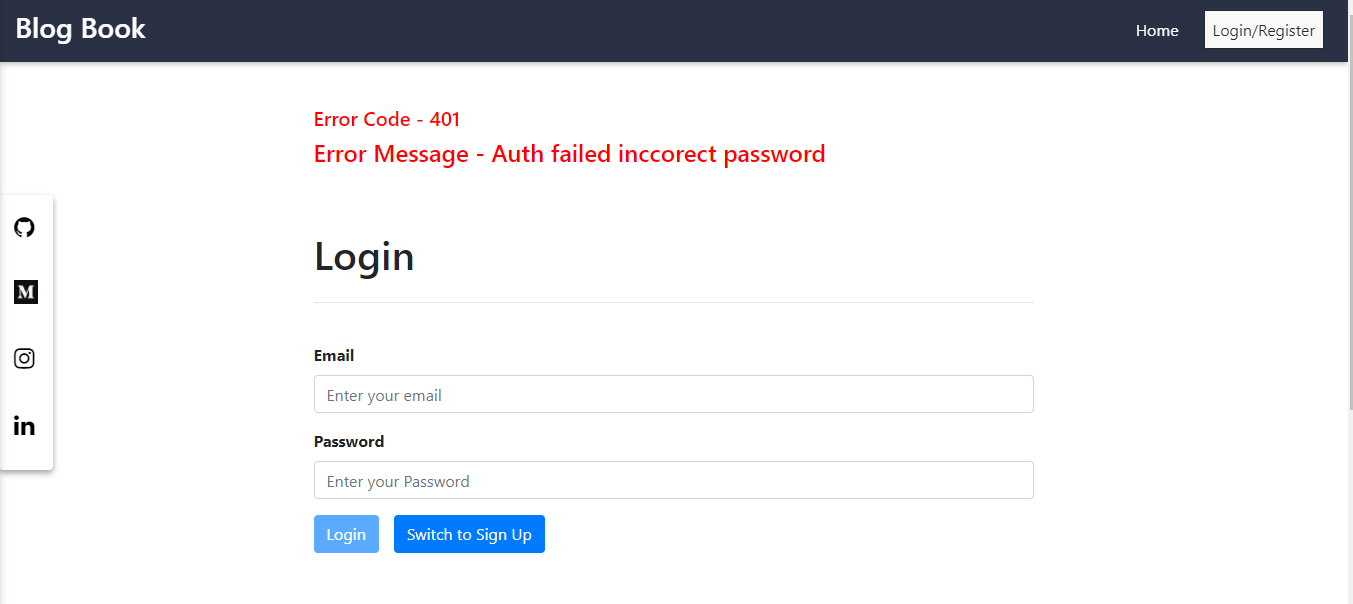
res.status(401).json({ message: "Auth failed!" });
}
};Here’s another Node.js snippet, implemented with Express.js middleware, which intercepts all requests and checks the presence of the JWT.
We are using a common implementation, which expects the JWT to be passed into the HTTP header to check whether the token is having required data or not
As a result of the verifying routine, we’re sending HTTP 401 Unauthorized if the token is expired and an HTTP 400 Bad Request if the token is missing in the headers.
Client-Side Part:
So we have React as our client-side application where we will set up our react app first. Now we will be creating a brand new react project and we will set up our react project to interact with the backend which we have created in the above steps.
- Creating React App
npx create-react-app Blogapp-using-mern
cd Blogapp-using-mern
npm start
2. Setting Up Axios in Index.js
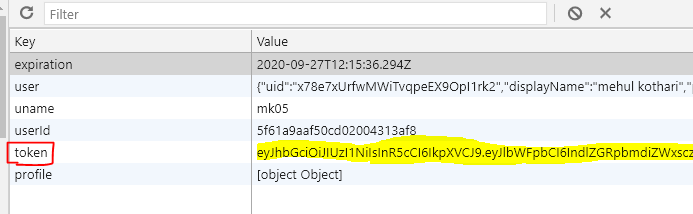
axios.defaults.baseURL = 'https://zany-periodic-fisherman.glitch.me/api';let userData = JSON.parse(localStorage.getItem("userData"))
let tokenif (userData) {
  token = userData.token
}
axios.defaults.headers.common['Authorization'] = `Bearer ${token}`;
axios.defaults.headers.post['Content-Type'] = 'application/json';axios.interceptors.request.use(request => {
  return request;
},
error => {
  //  console.log(error);
  return Promise.reject(error);
});axios.interceptors.response.use(response => {
  return response;
},
 error => {
  console.log(error.response);
  return Promise.reject(error);
});
#9 Creating Auth Component
Here in the Auth component, we will have one form which we will utilize for both login and Signup on the basis of the state. On click of a button, we will switch our button to Signup to Login and vice versa.
Creating Auth Context to Manage token throughout our App
import { createContext } from 'react';export const AuthContext = createContext({
  isLoggedIn: false,
  userId: null,
  token: null,
  login: () => {},
  logout: () => {}
});
Handling Authentication in App.js using AuthContext
Now as soon as the user signs up our task completes in the auth component itself where we can show a successful response on user-created in the database. But when user sign-in we need to manage the token in our local storage and also do some calculation and checks whether the token is valid or not before visiting any route. So that is the reason I have selected app.js to do all such tasks.
So in the above code, we are wrapping all our routes with AuthContext which will be responsible for executing the functions provided in the Auth context and set the token. So as soon as the user login from the auth component, control goes to the App component where it encounters the login function.
In the Login function, we set our token expiration date and userData and save the same data in localStorage.So when any route is executed Authcontext provides this data to all those routes.
Restrict backend to only read-write if the user is authenticated
There are several comments about how to use the Interceptor and all comments are definitively app-context dependent, so consider this snippet as just an example on how to append it.
As you can see, we’re using the HTTP header named “authorization” with the “Bearer” prefix, as the server expects it to be followed by the token which we receive from the backend.
In this case, we’re storing and reading the token in the local storage. As before, this is just an idea and you might prefer a SessionStorage or something else.
Also if we want to restrict our backend to only read-write to the database only if the user is authenticated we can do this using our middleware we have created. Check the snippet below.
router.get("/mypost",
checkAuth,
(req, res, next) => {
    Post.find({creator: req.userData.userId}).then(post => {
      if (post) {
        res.status(200).json({
            message: "Posts fetched successfully!",
            posts: post
        });
      }
    })
    .catch(e=>{
        console.log(e)
    });
  });
So here checkAuth is our middle-ware which we have created already which will check for the token in the request.
{creator: req.userData.userId}In the above line, we are getting the creator from our middle-ware where we are storing the decoded token in userID. If the token is present then only the request will be processed.
Demo:


Conclusion
JSON Web Token is well supported. On the official website, you can find libraries and tools to use it in almost any language, from Python to .NET apps, and Java to Node.js.Here we have completed the complete authentication system using the MERN stack app.
You will need several hours to implement a robust authentication method, but it will definitively be worth it. You can find the Github repo below for the same code


Comments
Post a Comment