Authentication Using JWT in MEAN Stack
GitHub URL: https://github.com/mehulk05/Blog-using-mean
Live Demo: https://mehulk05.github.io/Blog-using-mean/#/
A live demo

JSON Web Token is one of the best standards to implement an authentication system in your MEAN stack app. In this article, we will just have look at authentication in the MEAN stack app using JWT.
What is JSON Web Token?
JSON Web Token (JWT) is an open standard (RFC 7519) that defines a compact and self-contained way for securely transmitting information between parties as a JSON object
When should you use JSON Web Tokens?
Here are some scenarios where JSON Web Tokens are useful:
- Authorization: This is the most common scenario for using JWT. Once the user is logged in, each subsequent request will include the JWT, allowing the user to access routes, services, and resources that are permitted with that token. Single Sign-On is a feature that widely uses JWT nowadays, because of its small overhead and its ability to be easily used across different domains.
- Information Exchange: JSON Web Tokens are a good way of securely transmitting information betwWhat is the JSON Web Token structure?
In its compact form, JSON Web Tokens consist of three parts separated by dots (.), which are:
- Header
- Payload
- Signature
Therefore, a JWT typically looks like the following.
xxxxx.yyyyy.zzzzz
Because JWTs can be signed — for example, using public/private key pairs — you can be sure the senders are who they say they are. Additionally, as the signature is calculated using the header and the payload, you can also verify that the content hasn’t been tampered with.
The Server-Side Part: Create a JWT
const express = require('express')
const User = require('../models/user')
const bcrypt = require("bcrypt");
const jwt = require("jsonwebtoken");const router = express.Router();
//SIGNUP ROUTE
router.post("/signup", (req, res, next) => {
bcrypt.hash(req.body.password, 10).then(hash => {
const user = new User({
email: req.body.email,
password: hash
});User.findOne({
email: req.body.email
}).then(user1 => {
if (user1) {
return res.status(401).json({
message: "User Already Exist"
})
}user.save().then(result => {
if (!result) {
return res.status(500).json({
message: "Error Creating USer"
})
}
res.status(201).json({
message: "User created!",
result: result
});
})
})
.catch(err => {
res.status(500).json({
error: err
});
});;
})});
// LOGIN ROUTE
router.post("/login", (req, res, next) => {
let fetchedUser;User.findOne({
email: req.body.email
}).then(user => {
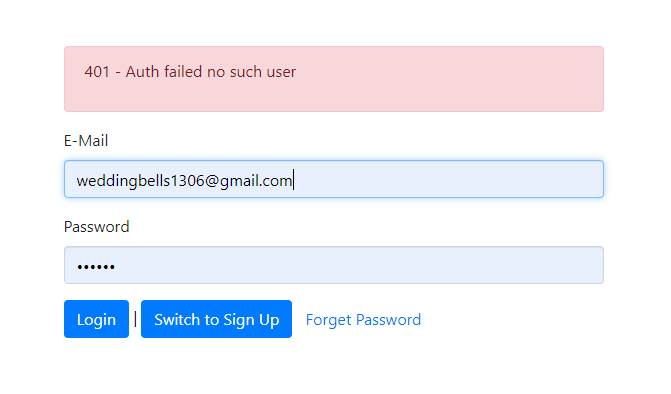
if (!user) {
return res.status(401).json({
message: "Auth failed no such user"
})
}
fetchedUser = user;
return bcrypt.compare(req.body.password, user.password);
}).then(result => {
console.log(fetchedUser)
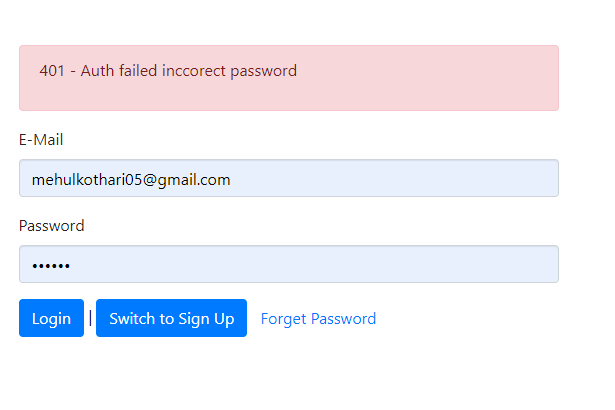
if (!result) {
return res.status(401).json({
message: "Auth failed inccorect password"
})
}// CREATING THE JSON WEBTOKEN WITH SIGNATURE AND KEY
const token = jwt.sign({
email: fetchedUser.email,
userId: fetchedUser._id
},
"secret_this_should_be_longer", {
expiresIn: "1h"
}
);
res.status(200).json({
token: token,
expiresIn: 3600,
userId: fetchedUser._id
});
})
.catch(e => {
console.log(e)})
})
module.exports = router
So the code snippets have a signup route that will check whether a user exists or not. If the user doesn't exist it will go further and encrypt the password using bycrypt module and return a 200 status code once it's done creating a user.
The next step is the login route, here it will check for user email and password are matching or not. If a matching user is found here we will do one important step. Here we will create our JWT token.
const token = jwt.sign(
        { email: fetchedUser.email, userId: fetchedUser._id },
        "secret_this_should_be_longer",
        { expiresIn: "1h" }
      );res.status(200).json({
        token: token,
        expiresIn: 3600,
        userId: fetchedUser._id
      });
- So here we are creating the JWT token with the first parameter of the “sign” method is the information that needs to be placed into the payload (and then into the token itself).
- The second parameter is the secret key used to create the digest.
- The third is the option representation. In this case, I set the expiration date of the token in seconds.
The Server-Side Part: Check and Verify a JWT (MiddleWare)
// check-auth.js
const jwt = require("jsonwebtoken");module.exports = (req, res, next) => {
  try { const token = req.headers.authorization.split(" ")[1];
 const decodedToken = jwt.verify(
   token,
   "secret_this_should_be_longer"
); req.userData = {
         email: decodedToken.email,
         userId: decodedToken.userId
   };    next();
  } catch (error) {
    res.status(401).json({ message: "Auth failed!" });
  }
};
Here’s another Node.js snippet, implemented with Express.js middleware, which intercepts all requests and checks the presence of the JWT.
We are using a common implementation, which expects the JWT to be passed into the HTTP header to check whether the token is having required data or not
As a result of the verifying routine, we’re sending HTTP 401 Unauthorized if the token is expired and an HTTP 400 Bad Request if the token is missing in the headers.
Client-Side Part:
On the client-side, we are using angular as our frontend. Here we have two options. First is we can attach our token to every HTTP request using HTTP interceptors. Second is we can make our service file to attach the token to only log in and signup requests. Thereafter we can have auth-guards and for post requests, we can make use of our middleware in the backend.
@Injectable({
providedIn: 'root'
})
export class AuthService {
private isAuthenticated = false;
private token: string;
private tokenTimer: any;
private userId: string;
private authStatusListener = new Subject<boolean>();
constructor(private http: HttpClient, private router: Router,
private profileService: ProfileService) { }
getToken() {
return this.token;
}getIsAuth() {
return this.isAuthenticated;
}getUserId() {
return this.userId;
}
getAuthStatusListener() {
return this.authStatusListener.asObservable();
}signIn(email: string, password: string) {
const authData: AuthData = { email: email, password: password };
this.http
.post<{ token: string; expiresIn: number, userId: string }>(
BACKEND_URL + "login",
authData
)
.subscribe(response => {
const token = response.token;
this.token = token;
if (token) {
const expiresInDuration = response.expiresIn;
this.setAuthTimer(expiresInDuration);
this.isAuthenticated = true;
this.userId = response.userId;
this.authStatusListener.next(true);
const now = new Date();
const expirationDate = new Date(now.getTime() + expiresInDuration * 1000);this.saveAuthData(token, expirationDate, this.userId);
this.router.navigate(["/"]);
}
},
err => {
console.log(err)
});
}
createUser(email: string, password: string) {
const authData: AuthData = { email: email, password: password };
this.http
.post(BACKEND_URL + "signup", authData)
.subscribe(response => {
this.router.navigate(["/"]);},
err => {
console.log(err)
});
}
logout() {
this.token = null;
this.isAuthenticated = false;
this.authStatusListener.next(false);
clearTimeout(this.tokenTimer);
this.clearAuthData();
this.router.navigate(["/"]);
}autoAuthUser() {
const authInformation = this.getAuthData();if (!authInformation) {
return;
}
const now = new Date();
const expiresIn = authInformation.expirationDate.getTime() - now.getTime();if (expiresIn > 0) {
this.token = authInformation.token;
this.isAuthenticated = true;
this.userId = authInformation.userId;
this.setAuthTimer(expiresIn / 1000);
this.authStatusListener.next(true);
}
}private getAuthData() {
const token = localStorage.getItem("token");
const expirationDate = localStorage.getItem("expiration");
const userId = localStorage.getItem("userId");
if (!token || !expirationDate) {
return;
}
return {
token: token,
expirationDate: new Date(expirationDate),
userId: userId
}
}
private setAuthTimer(duration: number) {this.tokenTimer = setTimeout(() => {
this.logout();
}, duration * 1000);
}private saveAuthData(token: string, expirationDate: Date, userId: string) {
localStorage.setItem("token", token);
localStorage.setItem("expiration", expirationDate.toISOString());
localStorage.setItem("userId", userId);
}private clearAuthData() {
localStorage.removeItem("token");
localStorage.removeItem("expiration");
localStorage.removeItem("userId");}
}
Communicate via AJAX Appending the JWT Using an Angular Interceptor
Check the snippet below.
import {
HttpInterceptor,
HttpRequest,
HttpHandler
} from "@angular/common/http";
import { Injectable } from "@angular/core";import { AuthService } from "./auth.service";@Injectable()
export class AuthInterceptor implements HttpInterceptor {
constructor(private authService: AuthService) { }
intercept(req: HttpRequest<any>, next: HttpHandler) {const authToken = this.authService.getToken();
const authRequest = req.clone({
headers: req.headers.set("Authorization", "Bearer " + authToken)
});
return next.handle(authRequest);
}
}
In this snippet, we’re using an Angular Interceptor, which is a good way to append the token to every HTTP request.
There are several comments about how to use the Interceptor and all comments are definitively app-context dependent, so consider this snippet as just an example on how to append it.
As you can see, we’re using the HTTP header named “authorization” with the “Bearer” prefix, as the server expects it to be followed by the token which we receive from the backend.
In this case, we’re storing and reading the token in the local storage. As before, this is just an idea and you might prefer a SessionStorage or something else.
Restrict backend to only read-write if the user is authenticated
Also if we want to restrict our backend to only read-write to the database only if the user is authenticated we can do this using our middleware we have created. Check the snippet below.
router.get("/mypost",
checkAuth,
(req, res, next) => {
    Post.find({creator: req.userData.userId}).then(post => {
      if (post) {
        res.status(200).json({
            message: "Posts fetched successfully!",
            posts: post
        });
      }
    })
    .catch(e=>{
        console.log(e)
    });
  });
So here checkAuth is our middle-ware which we have created already which will check for the token in the request.
{creator: req.userData.userId}In the above line, we are getting the creator from our middle-ware where we are storing the decoded token in userID. If the token is present then only the request will be processed.
Demo:
Conclusion
JSON Web Token is well supported. On the official website, you can find libraries and tools to use it in almost any language, from Python to .NET apps, and Java to Node.js.Here we have completed the complete authentication system using the MEAN stack app.
You will need several hours to implement a robust authentication method, but it will definitively be worth it. You can find the Github repo below for the same code


Mean Stack Course in Noida
ReplyDelete