Mongo DB – It’s an open-source NoSQL cross-platform document-oriented database.
Express JS – It’s a web-based application framework work with Node JS, It helps to build web apps and RESTful APIs.
Angular 7/8/9 – It's a TypeScript based complete front-end framework developed by the Google team.
Node JS – It is a free JavaScript run-time environment, It executes JavaScript code outside of a browser. It is available for macOS, Windows, Linux, and Unix.
I will be using the following plugins and tools to create the MEAN Stack app.
Follow this link to set up Node JS in your system. Simply download and install the node as per your system bit i.e 32 and 64 bit and OS
#2 Build a Node.JS Backend
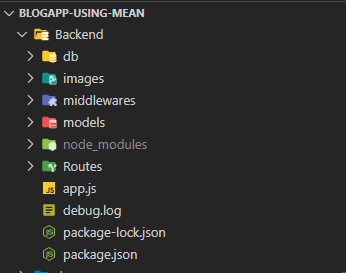
To write the manageable code, we should keep the MEAN Stack backend folder separate. Create a folder by the name of the backend or anything you like in Angular’s root directory. This folder will handle the backend code of our application, remember it will have the separate node_modules folder from Angular 7/8/9.
mkdir backend
cd backendnpm init -y
The above command will take you inside the backend folder and then generate package.json with all default configuration.
– Install and Configure required NPM packages for MEAN Stack app development
Use the below command to install the following node modules.
npm install --save body-parser cors express mongoose
body-parser: The body-parser npm module is a JSON parsing middleware. It helps to parse the JSON data, plain text, or a whole object.
CORS: This is a Node JS package, also known as the express js middleware. It allows enabling CORS with multiple options. It is available through the npm registry.
Express.js: Express js is a free open source Node js web application framework. It helps in creating web applications and RESTful APIs and act as middleware
Mongoose: Mongoose is a MongoDB ODM for Node. It allows you to interact with the MongoDB database.
Starting and stopping a server every time a change is made is a time-consuming task. To get rid of this problem we use the nodemon npm module. This package restarts the server automatically every time we make a change. We’ll be installing it locally by using the given below command.
npm install nodemon --save-dev
Also, make sure to change the package.json to start nodemon
#3 Folder Structure for Backend.
#4 Writing App.js
const path = require("path");
const express = require("express")
const mongoose = require("mongoose")const db = require("./db/db")
const postRouter = require("./Routes/post");const app = express();
app.use(bodyParser.json());
app.use(bodyParser.urlencoded({
   extended: false
}));
app.use(cors());const PORT = process.env.PORT || 3000app.use("/api/posts", postRouter)app.listen(PORT, (req, res) => {
console.log(`app is listening to PORT ${PORT}`)
})
#5 Writing db.js
To create the database you can go here to register and create a new database. Also, you will get the connection URL which I will be using in my code
const mongoose = require('mongoose');mongoose.Promise = global.Promise;const url = "mongodb://testuser:<password>@cluster0-shard-00-00.ecaql.mongodb.net:27017?ssl=true&replicaSet=atlas-ceza4t-shard-0&authSource=admin&retryWrites=true&w=majority"// Connect MongoDB at default port 27017.let mong = mongoose.connect(url, {
    useNewUrlParser: true,
    useCreateIndex: true,
    useUnifiedTopology: true
}, (err) => {
    if (!err) {
        console.log('MongoDB Connection Succeeded.')
    } else {
        console.log('Error in DB connection: ' + err)
    }
});
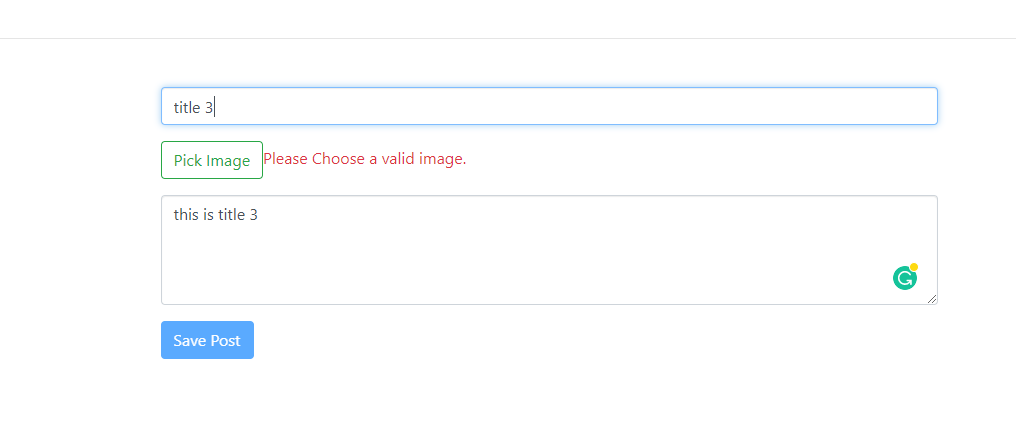
To create a post we will use Angular service and RESTful APIs. I’ve used Reactive Forms to register an employee. We are also covering Reactive forms validations in our MEAN Stack app tutorial.
#10.1 Post-create.component.html
<form [formGroup]="form" (submit)="onSavePost()">
    <div class="form-group">
      <input
        type="text"
        formControlName="title"
        class="form-control"
        placeholder="Post Title"
      />
      <span
        class="text-danger"
        *ngIf="form.get('title').invalid && form.get('title').touched"
        >Please enter a post title.</span
      >
    </div>

    <div class="form-group">
      <textarea
        class="form-control"
        rows="4"
        formControlName="content"
        placeholder="Post Content"
      ></textarea>
      <span
        class="text-danger"
        *ngIf="form.get('content').invalid && form.get('content').touched"
        >Please enter a post title.</span
      >
    </div>
    <button class="btn btn-primary" [disabled]="form.invalid" type="submit">
      Save Post
    </button>
  </form>
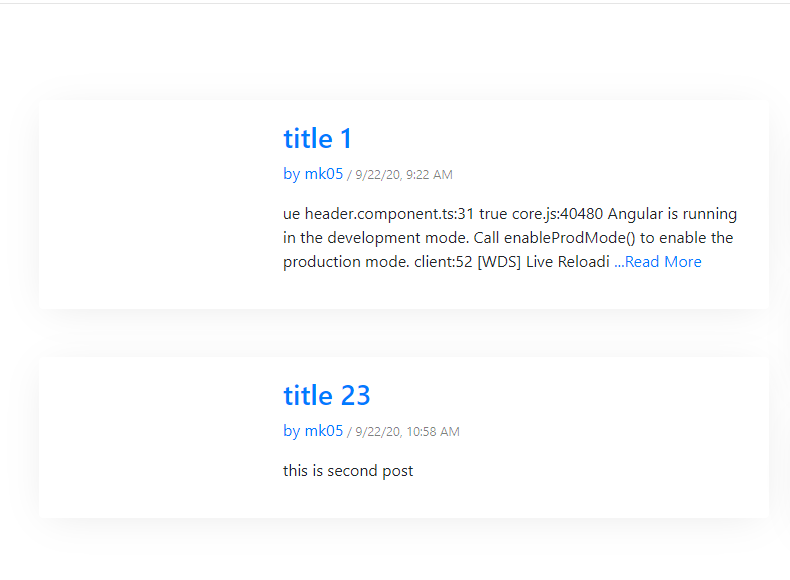
# 11 Show Post List and Delete Post Object using RESTful API in MEAN Stack App
Here we will fetch all the posts with their content. Also, we will perform our delete operation here where we have provided one button where when we click on it, the post will be deleted.
In order to edit post data, we need to add the following code in our createPost component which we will reuse for editing the data also. Also, note that HTML mark up will be the same for edit posts also. So I am skipping that part.
We have created a basic MEAN Stack Angular 7 CRUD app, now enter the below command to start your project on the browser.
ng serve
Demo
Create post
Post List
Conclusion
Finally, we are done with this MEAN Stack Tutorial using Angular 9/8/7 and Bootstrap 4. I have tried to highlight every essential topic in this tutorial. However, if you have skipped anything you can check out my Github Repo
Mehul Kothari Oct 13, 2020 · 5 min read Github: https://github.com/mehulk05/Blogapp-using-MERN Live Demo: https://mehulk05.github.io/Blogapp-using-MERN/ A demo of what we are creating Let us understand what does MERN stack means. Mongo DB – It’s an open-source NoSQL cross-platform document-oriented database. Express JS – It’s a web-based application framework work with Node JS, It helps to build web apps and RESTful APIs. React – React is a JavaScript library created by Facebook. React is a User Interface (UI) library. React is a tool for building UI components Node JS – It is a free JavaScript run-time environment, It executes JavaScript code outside of a browser. It is available for macOS, Windows, Linux, and Unix. I will be using the following plugins and tools to create the MERN Stack app. Node JS MongoDB Mongoose JS Express JS ReactJS Visual Studio Code #1 Setup Node JS development environment Follow this l...
Mehul Kothari Dec 12, 2020 · 4 min read Github : https://github.com/mehulk05/MyShop Demo Link: https://mehulk05.github.io/MyShop/#/ If you’ve ever found yourself asking ‘how can I access Google Sheet spreadsheets with JavaScript?’, then you’re probably not alone. You only have to type something like ‘reading google sheets data using javascript’ into Google and you’ll be inundated with a bevy of solutions to this conundrum. The problem is, in my experience, they’re either very complex and overblown, or quite difficult to get up and running with (e.g. poor documentation), or they’re just a bit too prescriptive with how they serve you those precious results. So that's why I am taking this opportunity to write a simple solution Firstly, is this right for my needs? The following blog allows for reading only from a publicly published Google Sheet. If your needs look like these, then it might be a great fit: You are able to publish your Google Sheet publicly ...
Technology : Angular 8, BootStrap,HTML5,CSS3. Github Link: https://github.com/mehulk05/Personal-Portfolio-Angular-Updated Working Demo: https://personal-portfolio0320.000webhostapp.com/ Angular is one of the most popular Javascript frameworks in the world for building modern web applications. Angular is created & developed by Google and has huge community support behind it. I made my Personal Portfolio Using Angular 8. Though I have used Angular8 there is not much difference in other versions of angular Prerequisites for an Angular 8 Project Angular brings a solution to deal with all of the configurations: Angular CLI . We can start developing an Angular project within a couple of minutes by using Angular CLI. 1. Node js version 10.9.0 2. Npm (version 8.x or 10.x). What is Angular CLI? CLI stands for Command Line Interface. Angular CLI is being used for automating operations in Angular projects rather than doing them manually...


Comments
Post a Comment